While working on my most recent project, “The Unearthly”, I was called upon to create the Necronomicon. This would be a prop in the film, but still had to be an actual book with all the bells and whistles.
Originally I planned on finding a nicely leather bound book and then alter it and fabricate it into the prop. I did a lot of searching and didn’t find anything that I liked. I had only so much budget and most of it would have gone into purchasing a ready made hand-made book. So why not do it myself.
Now, I’ve never bound a book. Never even thought of doing it before. So I did my fair share of research. I would say that this set of youtube videos was what I watched the most: Eoiyin Hawthorn’s Wonderer’s Grove Youtube Channel He has clear videos and they were all pretty simple to follow along.
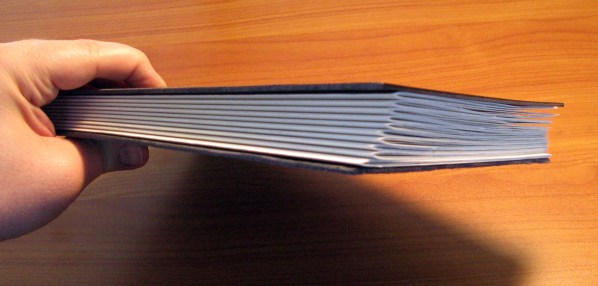
I started off by taking some drawing paper and cutting it to size (doubling the width as each will be folded). I then folded each individually to get a nice crease and then put them in groups of 5 / or 10 pages when folded. I then made 10 groups of 10 pages. I knew that I didn’t want to make each section too thick as I wanted it to be easy to work with. After that I used an awl (had to sharpen mine) to punch holes in it in order to sew the pages together and connect them to the cords. I punched the holes about an inch and a quarter from each other and kept the distance from the bottom of the book to the first hole a greater distance than the top of the book to the first hole there. I believe that’s how it’s traditionally done. But don’t quote me on that. Finally I cut the covers. I used some drawing pad covers. They were sturdy and light weight. I think they were pressed fiber. At first I was nervous with that – should I have used wood? But it turned out nice and strong. Last I drilled holes where I wanted the cords. Keeping in mind that there would be more room from the bottom of the book to the bottom cord and less room from the top of the book to the top cord.
All the pages folded and the covers cut to size:
Next step was to sew the pages to the cord. I don’t have any step-by-step images of those steps (wish I did, but I plan on doing this again so I will take some then). The cords I used were originally going to be the same type of nylon white rope used for boating. But I didn’t think they would stand out enough with the layers of leather on it. I really wanted the cords to shine so I used some heavy duty natural fiber cords – basically rope. The sewing step is a long one so I had a movie playing in the background while I did it.
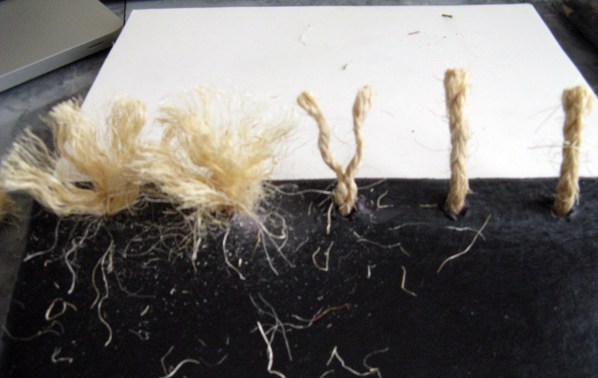
After that step was done, it really started to feel like I could do this and do it well. My next daunting step was to glue the cord to the cover. You do that by taking the cords that are popping through the cover and unravel them (not easy with rope!):
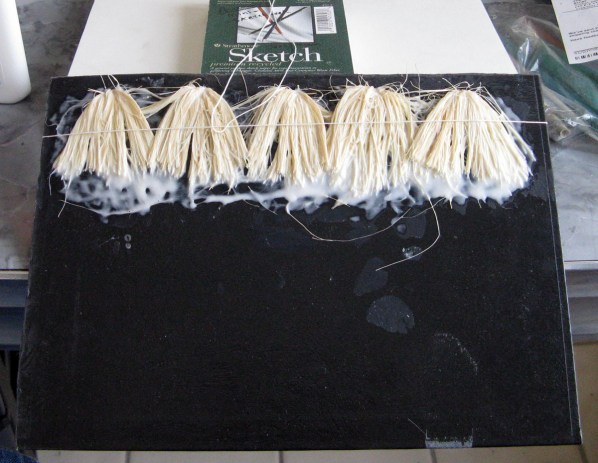
Then you spread them out and glue them down. Believe it or not, this whole project was glued with Elmer’s glue all. Well, I did use a little bit of super glue with the detail work later on, but most everything was Elmer’s. Getting back to the gluing, the rope I used continually popped back up so I had to tie it down. I noticed that I also had to use a thick little sketch pad to keep the spacing there between the cover and the pages. Without the spacing, the cover wouldn’t open:
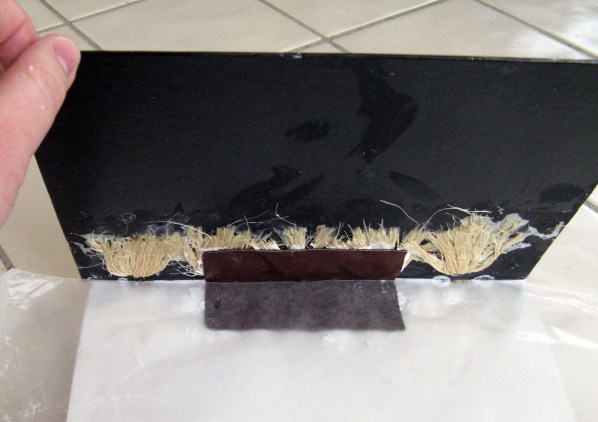
After the glue set up overnight, I tested how well it opened and closed. Honestly, it was a little tough to keep it closed. I may have not given it enough slack or maybe it was just the nature of the rope. But when it was closed, it really had the feel of an old book. Really cool to see it coming to life!:

Now, the last step before working on the spine is to glue a strip of leather on the interior of the cover (front and back) to the first interior page:
On to the spine in the next post…


3 comments